“On Wednesdays we wear pink…”
OK, so this is very exciting for me! It’s my first Fashion Wednesday post, and I thought long and hard about what my first post should be, and the final verdict was… WIRE HEADBANDS! You know those adorable headbands they have at American Apparel, that you could just die for…except that they’re $20! Yeah, I’m sorry, I don’t love any headband $20 enough, unless it’s got diamonds in it (that’s an exaggeration, but you get the point). Well, I love those little headbands, and one day I decided to try to make one, and it didn’t turn out half bad, so I continued to make them and they seem to be the easiest little sewing project ever. Here’s what you need:


Materials:
-scrap fabric at least 7″ wide and at least long enough to go around your head plus about 3 inches extra
-wire. any old wire, it’s easy to find at craft stores or tool stores, this needs to be the same length as your fabric.
OK, so the first step is folding the right sides together, so that your head band is inside out. Sew your headband together lengthwise so that you end up with a long tube of fabric. Then sew closed ONE of the ends of your headband. Once you have done that, turn your headband right side out
Sew with the “wrong” side facing out

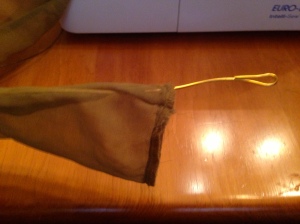
Now insert your wire and make sure it goes all the way to the end of your headband and that none of it is sticking out, it should end a couple of centimeters on the inside, as you will need to close up that seam once you’re done. I tend to make my wire a little bit longer and bend it, so it’s not pointy and doesn’t rip the headband once it’s done.

Now that the wire is inside, carefully sew the a stitch about 1/2 an inch wide to encase the wire. You may prefer to sew this casing before inserting the wire, I just prefer to do it this way for some reason 😛 Make sure you go slowly, this stitch will show on the outside, so it’s a bit nicer if it’s straight!

Once you have the wire sewn into its little pocket, you can fold the open end of the headband inside itself and sew it closed, I usually sew this stitch about 2 centimeters from the edge, I like it to be right near the edge.
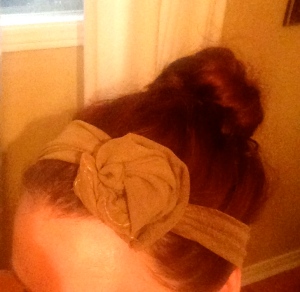
And now your headband should be done! Seriously, it’s as easy as that! I think that these headbands are WAY too cute, and I wear them ALL the time. You can wear them a variety of ways, here are just a couple of the ways that I usually wear them:

 All in all, this craft is DEFINITELY a MUST-DO!
Oh, and here’s a Handy Tip:
You can use all kinds of cool fabrics to make your headbands! I like to go to the second-hand store and find unique fabrics to make these. (The polka dot headband was a pillow, the red headband was silk pajamas, the green headband was the lining of a skirt I already had (so now they match perfectly 😉 ), the plaid headband was an old flannel shirt, and the black headband was scrap fabric from a previous project!)
Thanks for reading!

